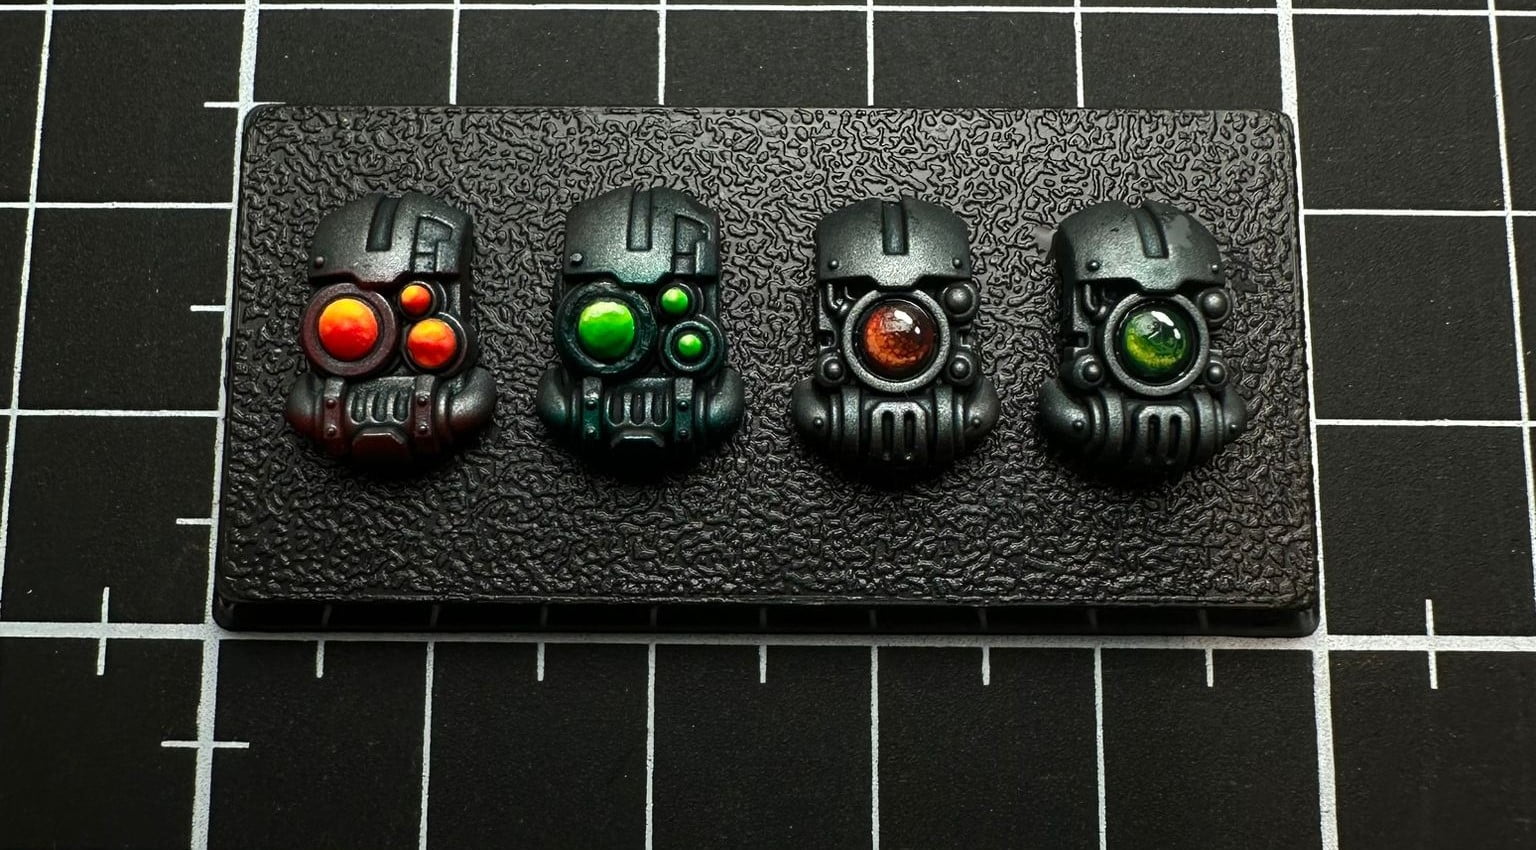
Lenses, jewellery, crystals, aims, gems, scopes…. They may not be as useful on our battlefields as our miniatures’ weapons, but they certainly add the perfect touch of colour to complete our colour schemes. Besides, in the 41st millennium universe your life is probably short, so at least make it bright!
We’re going to come up with 2 methods to create our gems and visors. These methods start from 2 different premises.
- The lens, viewfinder or gem shines, i.e. it emits light, so it can be the source of an OSL and will therefore be a point of maximum light in our miniature.
- The lens, viewfinder or gem is like a crystal, with a bright colour but it does not have the capacity to emit light, so it only reflects and refracts the light it receives.
Catch everyone’s eyes
Download your free painting guide
This guide is like a crash course in painting where you will discover how to judiciously choose and design the most stunning and impactful colour scheme to make your army a real eye-catcher both in the display case and on the gaming table.

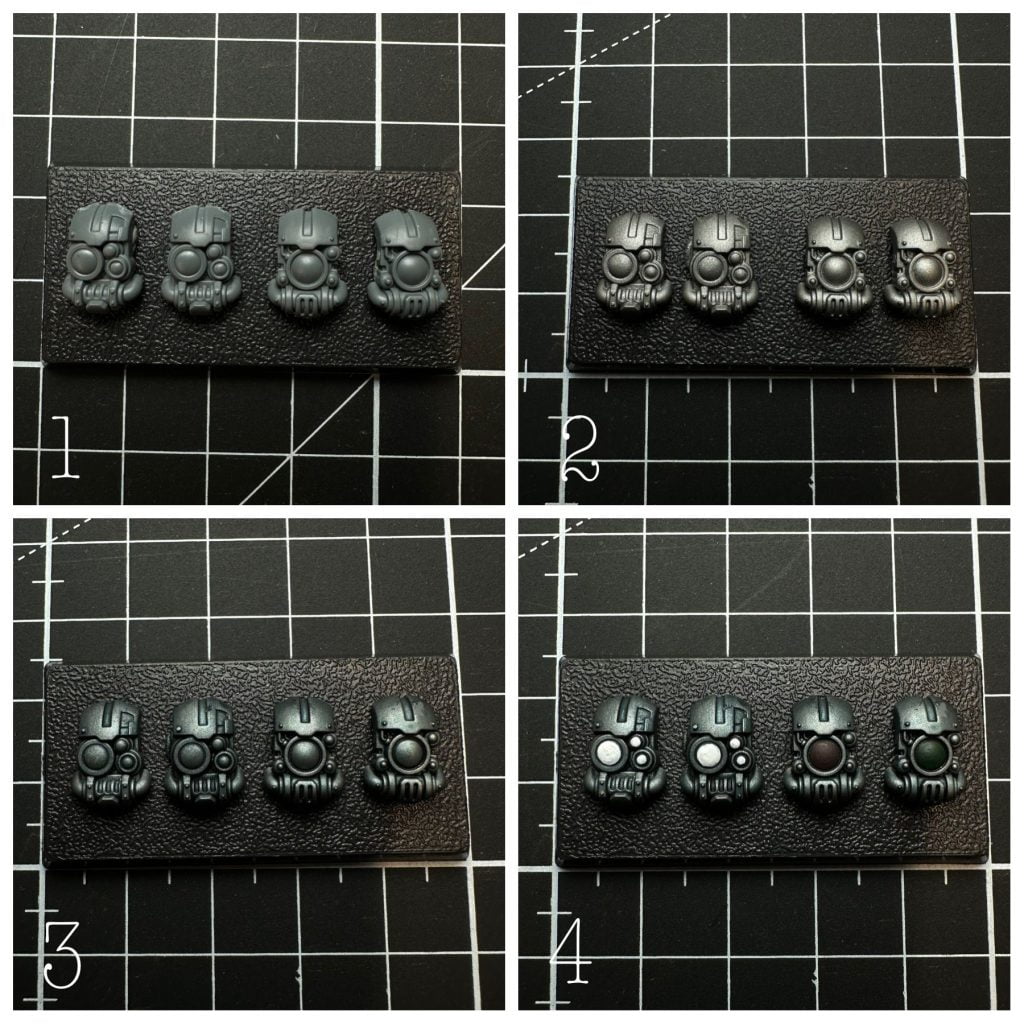
Then we will apply both premises in red and green. It is up to you to choose the one you like the most for your miniatures.
1. We will use Armiger masks, as they have round lenses that are very suitable for learning this method. In addition, their size allows us to work with more freedom.
2. We prime in black and apply a metallic paint of our choice.
3. We highlight the shapes of the mask with a diluted wash of AK smoke black
4. We paint the lenses that will emit light white. And those that do not emit light, with AK black red and AK black green respectively. For the latter, a dark base is important to generate sufficient contrast.
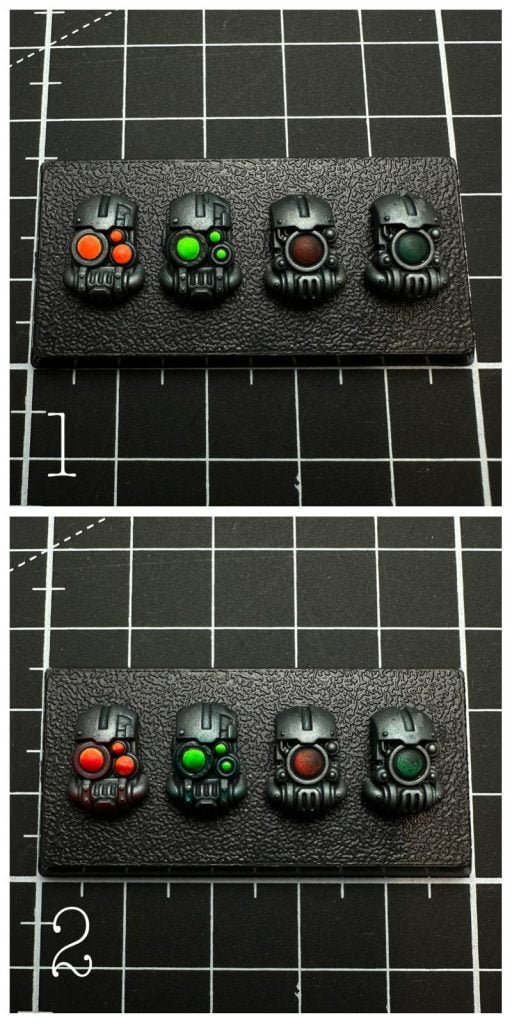
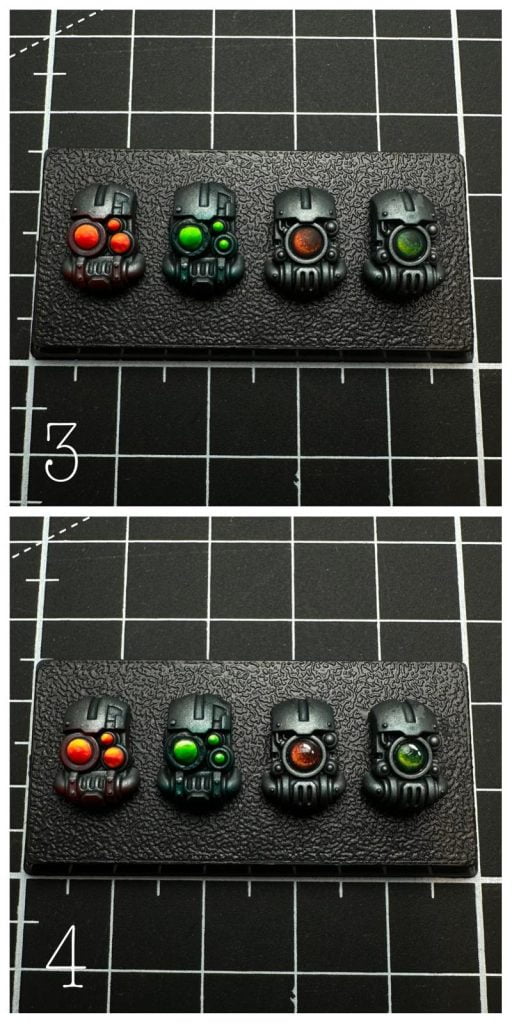
Next we will build the structure of our lenses.
1A. We evenly cover the entire white surface with AK fluorescent Orange.
1B. We uniformly cover the entire white surface with AK fluorescent green.
1C. We apply a first light in the form of a crescent moon occupying 80% of the lens with AK burnt red.
1D. We apply a crescent-shaped first light occupying 80% of the lens with AK dark green.
2A. Airbrush the lower part of the lens with Liquitex cadmium red. It doesn’t matter if we paint also the lower part of the mask, because it will help to give chromatic coherence to the whole, as the metals reflect the light around them.
2B. Airbrush the lower part of the lens with Liquitex phtalocynanine green. It doesn’t matter if we paint also the lower part of the mask, because it will help to give chromatic coherence to the whole, as the metals reflect the light around them.
2C. We apply a second light in the shape of a crescent moon occupying 40% of the lens with AK deep green. 40% of the lens with AK deep green.
2D. We apply a second light in the shape of a crescent moon occupying 40% of the lens. 40% of the lens with AK deep red.
3A. We apply a small curved line on the top of the lens with AK Luminous Orange.
3B. Apply a small curved line on the top of the lens with AK fluorescent yellow.
3C. We apply a second light in the shape of a crescent moon occupying 20% of the lens with AK deep Orange.
3D. We apply a second crescent-shaped light occupying 20% of the lens with AK frog green.
4A. We apply a spot of AK fluorescent yellow on the top.
4B. Apply a mixed spot of AK white with AK fluorescent yellow in a 1/4 ratio on the upper part of the lens.
4C. We apply a white dot in the upper right part, representing the zone of maximum light reflection.
4D. We apply a white dot in the upper right part, representing the zone of maximum light reflection.
Finally we will apply ultra matt varnish to the lenses that emit light to avoid random glare and glossy varnish to the lenses that do not emit light to create the crystal effect.
This same scheme can be applied with a multitude of different colours and shapes. And in the case of luminous lenses, the possibilities are endless in terms of reflections on the rest of the miniature. So don’t hesitate and give colour to your lenses.
Download the behind scenes of a project
Want to know how we work? We have documented a client’s project from start to finish so you know what it will be like to work with us.
