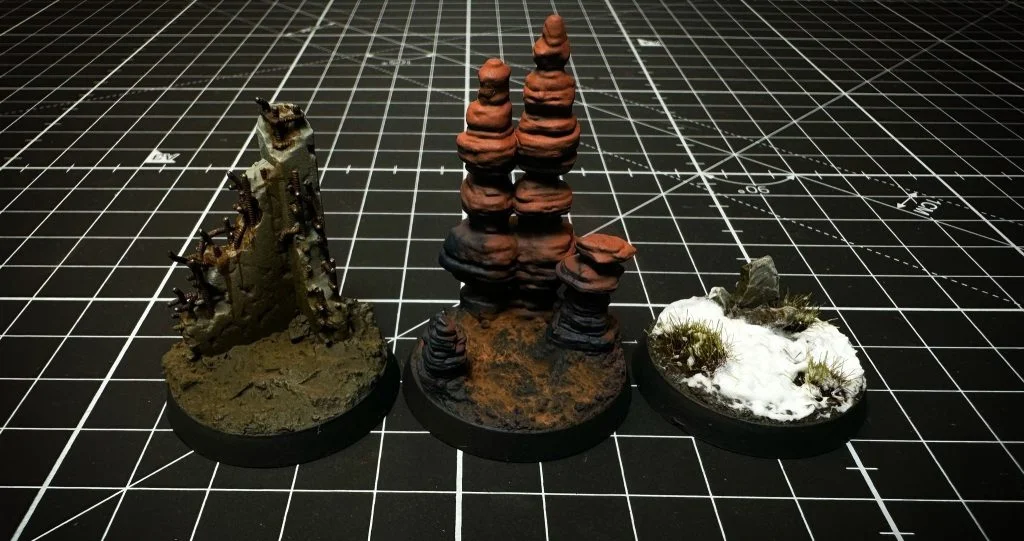
“IN THE GRIM DARKNESS OF THE 41st MILLENNIUM, THERE IS ONLY… RUST”
Do you really think that in the immense blackness of the 41st millennium all you find is war? Well, yes, there is, but there’s something else growing like weeds… Warhammer Rust! Who would have thought it, eh? It’s the year 40000 and nobody has bothered to invent a decent antioxidant.
Look, if you’re looking for something cool to do with your miniatures, rust could be your new best friend. And you know what? It’s as easy to do as taking your socks off after a hot day.
What does it do? Well, for one thing, it gives your miniatures a ‘I’ve seen things you wouldn’t believe’ vibe. And on the other hand, colour-wise, that orangey touch makes your miniatures stand out as if they were rock stars at a concert.
But it’s not all about looks. Do you want to tell a story with your pieces? Rust provides the perfect backdrop. Imagine: every speck of rust is a battle won, a blow dodged, a ‘Not today, Mr. Death’. And if that’s not epic, I don’t know what is.

Catch everyone’s eyes
Download your free painting guide
This guide is like a crash course in painting where you will discover how to judiciously choose and design the most stunning and impactful colour scheme to make your army a real eye-catcher both in the display case and on the gaming table.

Understanding rust
In this article we are going to show you 3 methods to include rust effects on your metal surfaces in a simple but very attractive way.
In addition, in one of them we will use a product that will give you incredible results with minimal effort.
However, it should be said that all these methods are compatible with each other and can be applied simultaneously on your models, as all surfaces do not rust in the same way. Texture, metal material, primer and environmental conditions all have a major influence on oxidation. Here are some examples.

First method: Dry brush
The first method to make Rust will be based on the dry brush technique. In this technique we will use a brush from which we will remove most of the paint, and we will deposit small amounts of slightly wet paint on the most prominent parts of our miniatures, highlighting textures and edges.
We will start by priming our piece with a black primer. An excellent base for any metallic effect and especially for rust.
Base coat for the rust
Next, we will apply 3 successive coats of orangey colours typical of the oxidation of iron-containing compounds. These are
- Citadel black primer.
- Hull red by AK interactive.
- Medium rust by AK interactive.
- Light rust by AK interactive.
These colours are only suggestions and any other similar colour of any brand is useful.
The most important thing to keep in mind is that there has to be a noticeable difference between the darkest and the lightest colour. This way we will maintain the contrast that allows the effect to be “read” correctly.
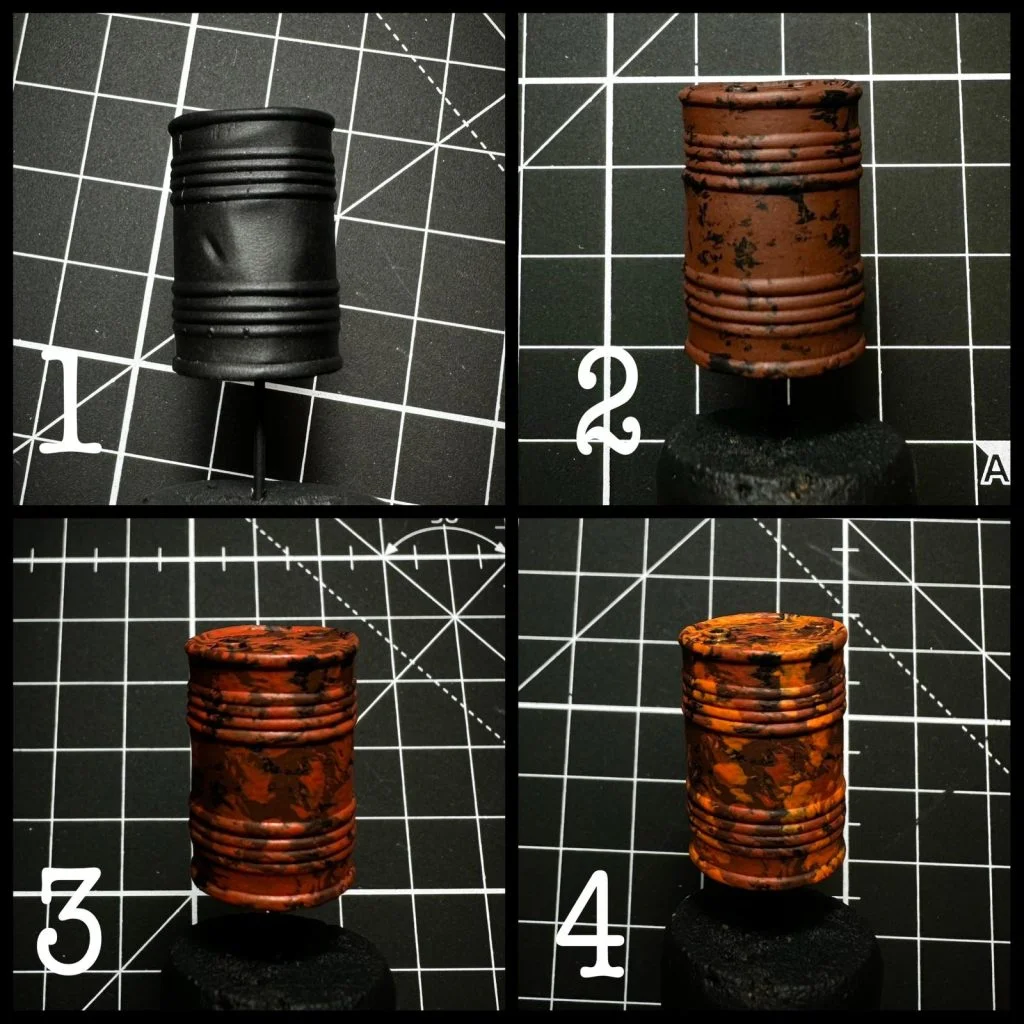
Tips:
– Apply each successive layer in a disorderly way, leaving the previous layer visible. So that, at the end you can see both the black of the primer and the 3 colours applied.
– Don’t worry about the texture that the brush may leave. In fact, that texture can help to make the effect more authentic.
Once the non-metallic acrylic rust colours have been applied, we will apply the metallic dry brush technique.
We will use 2 metallic colours, in this case Cobalt blue from AK (an intense metallic blue) and Gun metal from AK interactive (a classic metallic colour).
Plus black from AK interactive, of which we will explain its function later.
The idea behind the use of a blue metallic on an orange base is based on colour theory. We can see that blue and orange are in opposite positions on the wheel. What do we get with this? The answer is a high colour contrast. Something that is very attractive to the eye.
Metallic dry brushes
We will give successive dry brushes, covering less and less surface with each one. The colours are
- Cobalt blue AK interactive
- Gun metal AK interactive
- Black AK interactive
- Natural Steel by AK interactive
The purpose of this last Black drybrush is to age the metal and to generate a light patina of dark rust typical of many metals. It also moderates the shine of the metal.
In step 4 we apply a light chipping with a sponge, to simulate the small blows that the metal has received. It is important to be conservative with this, because if we overdo it we will add unnecessary noise to the piece. We will do this chipping with a light metal, in this case Natural Steel from AK interactive.
Finally, here is the result of our first method. A quite realistic and not too flashy old rust.

Second method: Enamel
The second method to make Warhammer Rust is based on enamel products. These are oil-like products whose diluent is white spirits. Enamel products are characterised by a very low surface tension, which means that they can be deposited very quickly in gaps and grooves, just as rust does naturally.
In addition, this product has a very long drying time, which means that it can be applied and removed as desired, without haste. We can also blend it and create gradients easily with a sponge.
These are the enamel products we will use. In short, as in the previous method, there are two colours with a lot of tonal difference between them, which will generate contrast.

Enamel blasting
Start as in the previous method OF Warhammer Rust by priming the piece in black and then apply a coat of any dark metallic paint. It is not relevant which metallic paint we use, even if it does not cover 100%, this can add tonal variety once the enamel has been applied.
Now we will apply the enamel products.
- Black primer + silver paint coat.
- First of all the darkest tone. We will apply it without fear and in a moderate amount and before it dries, we will remove the excess until we are satisfied with the result.
- When the first product dries, we can apply the second, this time more conservatively. We can also add a little dripping, simulating the rust dragged by a liquid that falls on the surface of the metal.
- Finally, as in the previous method, a little chipping to simulate bumps and our effect is ready!

Third method: The secret weapon
And now the most awaited moment… the secret weapon…
This is a very fast drying alcohol based product. When it dries, it generates gradients with a lot of contrast in warm colours in a very fast way. It basically reproduces the parameters that we tried to capture in the previous methods, but extremely fast. Its handicap… we have no real control over the effect and it may not always give us the desired result.

Instant rust effect
Its application is very simple.
- Start with a black primer and a metallic base as in the previous method.
- Then apply the product and let it dry. We can simulate some kind of run-off if we wish.
- Apply a light chipping as in the previous method and that’s it.

Tips:
– We must shake this product very very well, it has a tendency to separate.
– It works best with warm temperatures so warming it slightly with your hands or hot water before use can be a good option to obtain an interesting result.
As previously mentioned all of these effects are compatible with each other, it is up to you to decide what you use them for. Armour, scenery, weapons etc… any metal part is susceptible to corrosion, so don’t put limits to rust! And remember… with great rust comes great responsibility!
Download the behind scenes of a project
Want to know how we work? We have documented a client’s project from start to finish so you know what it will be like to work with us.
